Lamcraft Digital Memories
Create custom memorial bookmarks online!
For tech help call 1-888-540-7770
Live support available M-F, 8-5 Central time
Placing and Working With Images
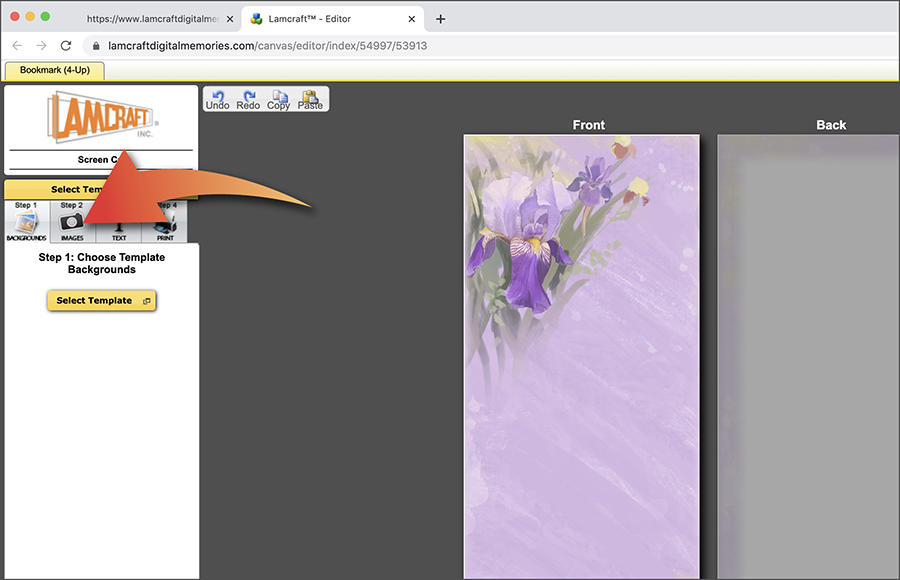
You can place photos, graphics and logos on the front and back of your bookmark or prayer card. Click on Step 2: IMAGES tab.
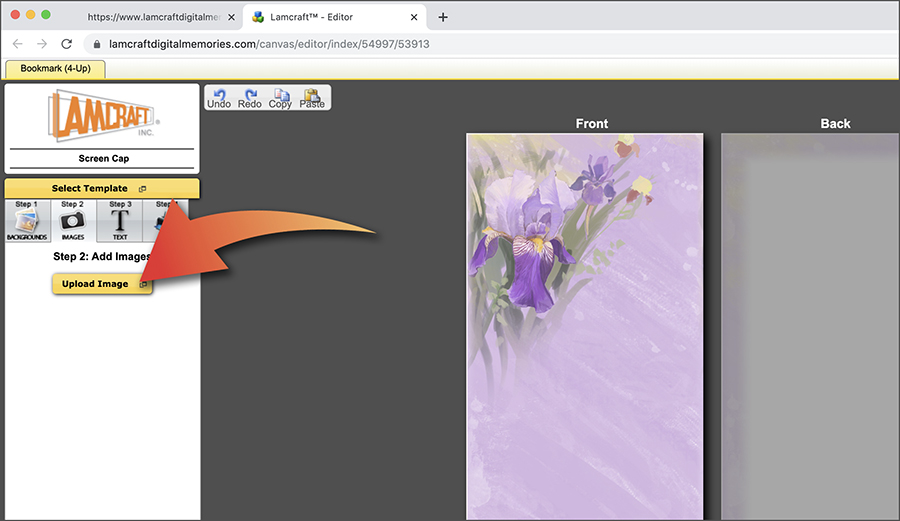
Once you select that tab, you will see a yellow button that allows you to Upload Image. Click on that button to access your photos or graphics.
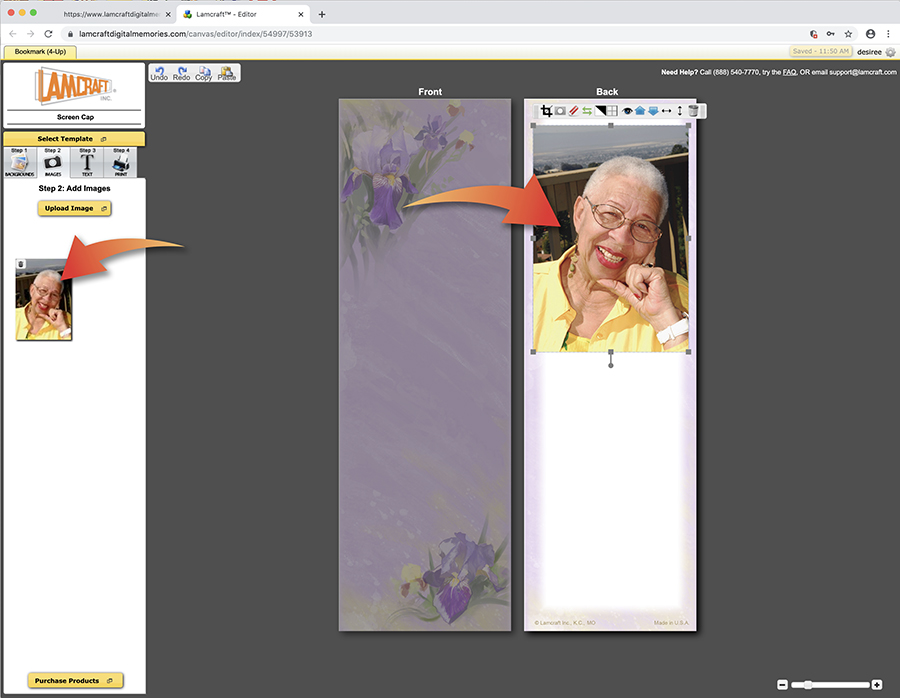
We decided to start on the back. After you select your image, it will appear in two places. It appears on the bookmark template and in the white area at the left. (Once you import a photo or graphic and it shows up on the left side, you can also drag and drop that image to the Front or Back in the template area.)
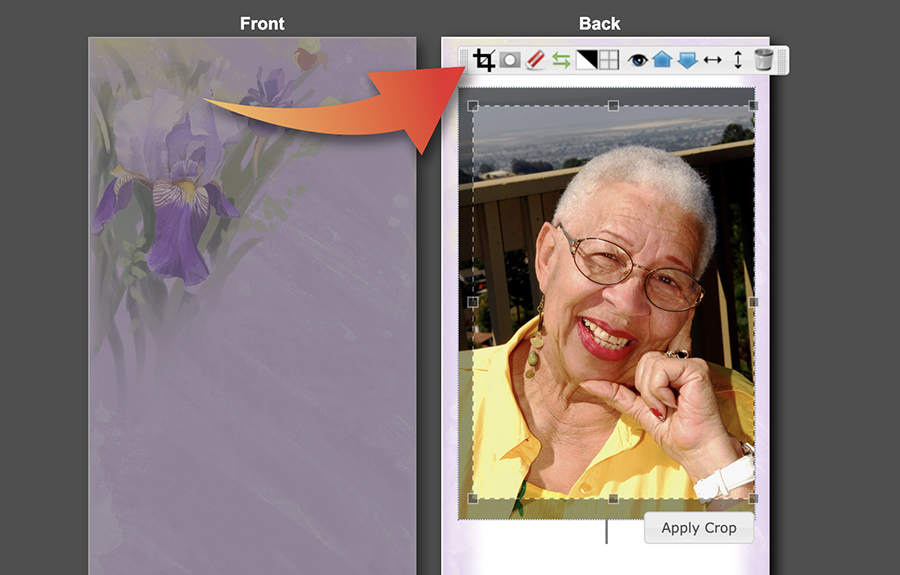
Above the image is the Toolbar that allows you to alter or enhance the image. You can move the Toolbar by clicking on one of the ends and dragging it. By scrolling over each icon, you can see what each tool’s function is. For example, the first icon is a crop tool. By clicking on the corners or the sides of the dashed box, you can crop (cut away) the parts of the photo you don’t want.
The second tool allows you to mask the image to apply a shape to the image or lightly feather the edges to provide a soft border.

You might want to experiment with the different tools to see what gives you the best results for each image. If you don’t like the results, you can always delete the image by selecting it and clicking on the last icon in the toolbar – the wastebasket – and start over. You can move the position of the image by clicking on it and dragging. To precisely center it, either vertically or horizontally, use the black thin arrows in the toolbox.
The next step will show you how to add text to the bookmark design.